
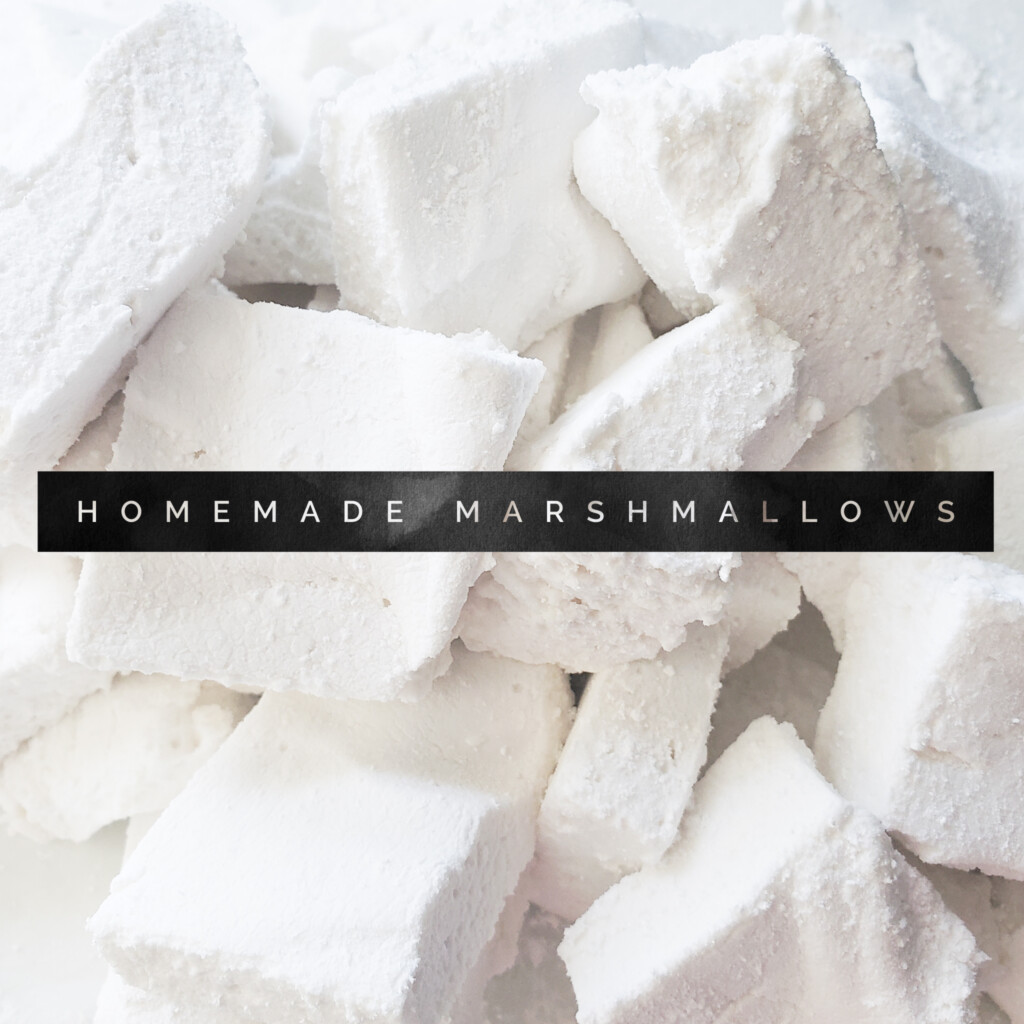
Who Loves Marshmallows?
I don't know about you but I have loved marshmallows as long as I can remember! I'm the girl that loves creamy, sugary sweets! So, marshmallows fall right into that category! Several years back, we adapted our eating and went to a mainly organic, more clean lifestyle for eating and really revamped what we allowed in our home. So, I started to be more creative to find ways to still indulge and not feel deprived but do it in a way that is more healthy for our bodies! Well, marshmallows was something I was determined to make healthier! I researched many marshmallow recipes...many contained corn syrups which are a No-No in my kitchen! ;-) So, I tweaked some recipes and found one I LOVE!
I'm going to get right to the point! When I search for a recipe, the last thing I like doing is scrolling through a ton of dialogue and random ads...I'm always like...just give me the recipe please!!!
So without further ado here's the recipe with pictures to help you as you go! Below the recipe is links to purchase the items I use to make these clean!!!
Homemade Marshmallows
2 Tbsp. clean gelatin (I like Great Lakes)
1 cup cold water, divided
2 cups organic cane sugar
1/4 to 1/2 cup organic powdered sugar
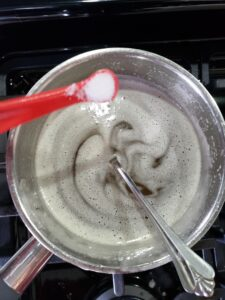
1/4 teaspoon sea salt
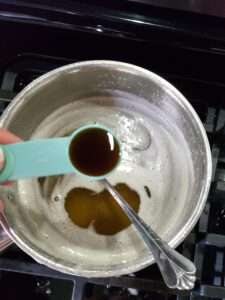
1 to 2 teaspoons organic vanilla extract
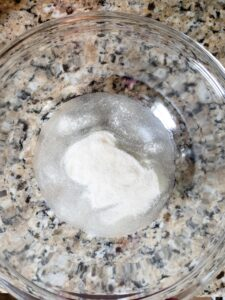
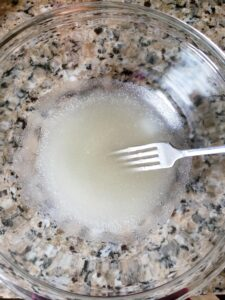
In a small bowl combine the gelatin and 1/2 cup of cold water and stir. Set the bowl aside...the mixture will become solid. Take out a 9"x 13" pan and slightly grease with coconut oil or olive oil. Then line the pan with wax paper. Sprinkle powdered sugar all over the wax paper and set the pan aside.
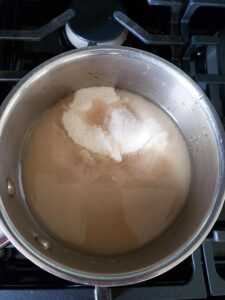
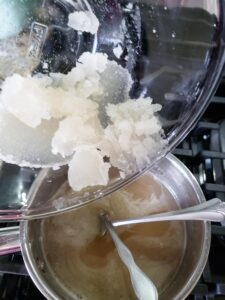
Place a medium saucepan on your stove and add sugar and the remaining 1/2 cup of cold water into it. Turn the burner on medium heat and stir until sugar is completely dissolved. This may take a couple minutes. Make sure to keep stirring so sugar doesn't burn. Once the sugar is dissolved, add in your gelatin mixtures and continue to stir until it comes to a boil on medium to medium-high heat.
(Be very careful...once the sugar mixture begins to boil it can boil over very quickly...and this mixture is extremely sticky and challenging to get off your stove and burners if it boils over! LOL!)
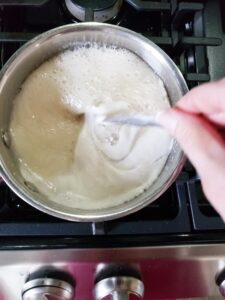
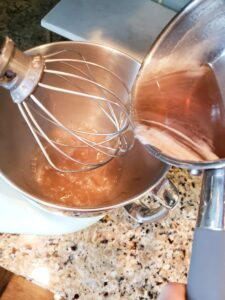
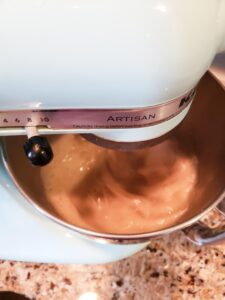
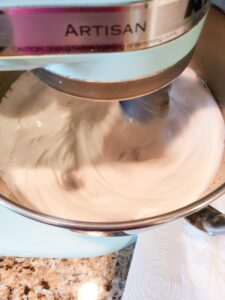
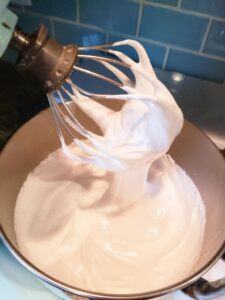
Once it is boiling, turn off the heat and remove from burner. Add in the salt and vanilla and stir. Next, you will immediately pour your sugar mixture into your mixer...I love my Kitchen Aid Stand Mixer. If you don't have no, then pour mixture into a large bowl. Use your mixer and start our on low setting for 1 to 2 minutes, allowing the heat to release. After that, increase the speed to high...for my mixer that is 10! You will mix on high for about 8 to 10 minutes until the mixture is white and fluffy! (See pictures)
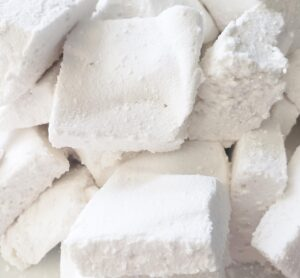
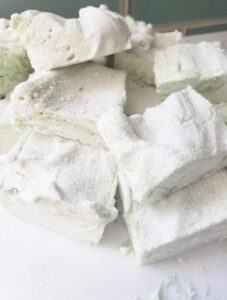
Once your mixture is at the right consistency, transfer into your greased pan and spread evenly. Then top with some more powdered sugar! Let the marshmallows set for a couple hours. We have cheated and dived into them sooner but the longer they sit the more they set up. Cover them with a lid. When they are ready, I remove the wax paper and put on a cutting board and but into the size of marshmallows we like. These can be used in place of regular marshmallows. You can also use them for S'mores...a note though...due to how clean these are...they are softer and can fall off the roasting stick more quickly...so you less time is needed toasting!
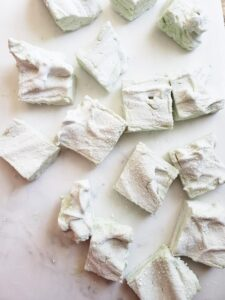
I love getting creative so I experimented and created Peppermint Infused Marshmallows...I used the same recipe as above but incorporated 4 to 6 drops of Peppermint Vitality Essential Oils and a several drops of a plant-based green food dye. I mixed that in at the final stages of the mixing. The result...a very happy family!!! <3 Make sure to only use essential oils like Young Living Vitality line that are made for internal consumption...most on the market are not safe to be used that way.
Enjoy!
Here are step-by-step pictures so you can see if your marshmallows look like they are going correctly...it can be very misleading that they are brown until the very end of the process! LOL!
Here are step-by-step pictures so you can see if your marshmallows look like they are going correctly...it can be very misleading that they are brown until the very end of the process! LOL!


1 Comment